Window Replacement
Home Improvement

How to Do Your Own Home Window Replacement

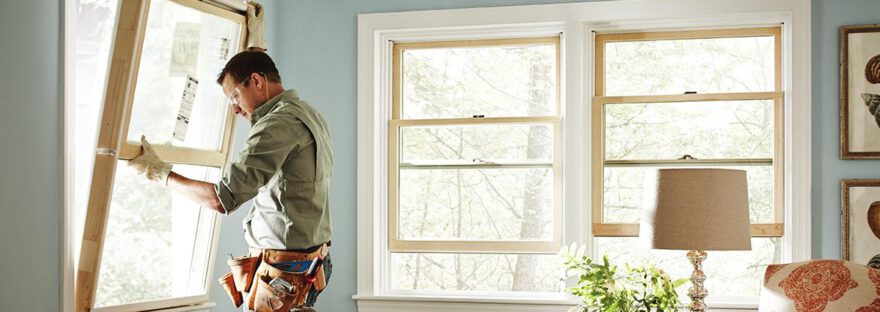
Window Replacement Massachusetts is a relatively simple project requiring careful planning. Before starting, recruit a friend to help you carry the new window into place.Window Replacement

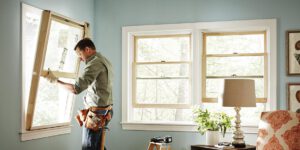
Set shims behind each pre-drilled screw hole to keep the window from bowing or pulling away from the jambs. Fill any gaps wider than 1/4 inch with a foam-rubber backer rod and caulk the area.

If you have a window frame with rotting wood, it will need to be replaced or repaired. A simple way to check for rot is to use a screwdriver and press into the corners of the frame. If the wood feels soft and spongy, it’s a sign that rot is present. In some cases, the rot will be so extensive that the entire frame needs to be replaced. If this is the case, calling a professional for window replacement is a good idea.

There are several different types of frames, including aluminum, vinyl, fiberglass, and traditional wooden frames. Each has its own set of advantages and disadvantages. The best choice for your home depends on the style of your house and your budget.

Aluminum frames cost between $200 and $500 and don’t require much maintenance. However, they aren’t very effective at insulating your home and can be susceptible to expanding and contracting in response to changing temperatures.

Composite frames are more durable than wood, but they can also be prone to damage and rot. Fortunately, they’re easy to repair and can last up to 50 years.

Another common problem with composite frames is broken seals and hardware components, which can be easily fixed by a professional. This is usually the result of an impact or weather event and typically doesn’t require a full replacement. Nevertheless, a professional will need to inspect your windows and determine the best course of action. They may recommend additional weatherstripping or sealing to create a more insulated seal. This will help to reduce drafts and energy loss. Alternatively, a professional can use spray foam to fill the gaps between the frames and the wall.

Glass

A cracked or damaged window pane not only looks bad but can also be a safety hazard. Depending on the extent of the damage, it may be necessary to replace the entire window or just the glass.

The glass itself can usually be repaired fairly easily. Small chips or smudges can be fixed with the appropriate paint and sanding to prevent moisture from seeping into the frame and causing further damage. The locking hardware can also be adjusted and lubricated to help with operation.

If the window is foggy or exhibiting condensation between the panes this could be a sign of a failed seal in the insulating glass unit (IGU). The IGU is made up of two or more panes of glass with an air gap between them that can be vacuum sealed or filled with an inert gas like argon or krypton to add additional energy efficiency. The seal failure can lead to condensation between the panes, or “blown windows” that can’t be repaired. If the window frame is still in good shape it might be possible to upgrade the IGU with a new insert.

The frame of a window can be made of wood, fiberglass, or vinyl. It is important to check the integrity of the frame at least annually for any signs of rot, which can compromise both the structural stability of your home and the health of its occupants. If the frame is rotted through it may be necessary to replace it. However, if the wood is still solid and free of mold it might be possible to repair the frame and preserve its ambiance with a new insert. It is important to be aware that replacing a window frame will likely require new sills, sash and operating hardware to keep the windows functional.

Weatherstripping

A 1/8-inch-wide gap around a door or window is like a 6-inch-square hole in your home, allowing drafts to sneak in and increase your heating and cooling bills. Replacing worn or damaged weather stripping is one of the easiest ways to lower energy bills and make your house more comfortable.

Before applying new weather stripping, clean the area using a damp sponge and mild detergent. This is to ensure that there is no grease or dirt that could damage the strip when it is applied. You may also want to use a glue-and-adhesive remover, but follow all manufacturer instructions carefully to avoid damaging the surrounding area.

Several types of weather stripping are available for doors and windows, with different materials suited for specific locations and purposes. Felt and open-cell foams are inexpensive but easily damaged, visible and inefficient at blocking air flow, while vinyl and metal options are more expensive but last for years and are durable.

When deciding how much weather stripping to purchase, measure the areas to be sealed twice before making any cuts and add 5% to 10% for waste. It’s important to apply the weather stripping snugly against both surfaces so that it compresses when the door or window is shut.

Window weather stripping is more complicated than for doors, as it has to be placed above and below the sashes as well as between them. Vinyl “V” strips are suitable for most windows and can be purchased in rolls of various widths to suit any size frame.

For more complex windows, professional installation is recommended, especially for double-hung windows, which require multiple strips to keep the sashes from rubbing against each other and creating gaps. A knowledgeable window specialist can help you choose the appropriate type of weather stripping for your home.

Sash

A window sash is the interior part of your home’s windows that holds the glass and operates to push it up or down. The sash is located just inside the frame and can be made of wood, aluminum or vinyl. Wood is a popular choice because it has a natural appearance and offers added durability. However, it is expensive and needs to be regularly stained or painted to protect the surface. Aluminum is a lightweight option that resists warping and is easy to maintain. However, it does not provide as much insulation as wood.

If your window sash is no longer able to be opened or closed properly, this may indicate that it is time for a replacement. A new sash is an investment that will offer increased energy efficiency and improve the overall look of your home. Alternatively, you can conduct a window repair instead if the problem is localized and not a result of general structural issues.

The first step to repairing a window sash is to remove the pegs holding the components together. This can be done with a pin punch and hammer. The goal is to remove the pegs without damaging the wood. Once the pegs are removed, a mallet can be used to separate the rail and stile. This will allow you to examine the joints and make any necessary repairs.

When a window sash is not being opened and closed correctly, it can cause water to leak into the home and create a poor seal. This can also lead to rot within the frame and sill. It is important to inspect your windows on a regular basis to ensure that they are functioning properly.

Trim

Window trim is not just an important structural component of a window, it also adds to the aesthetic of your home. It covers the gap between the frame and wall, concealing unsightly construction and providing a finished appearance for your interior. It also offers functional benefits such as insulating and blocking UV light and noise. Window casing is available in a variety of materials and styles to complement your home’s design, from traditional to craftsman.

For homeowners with basic woodworking skills, replacing interior window trim and casing can be a DIY project. Begin by purchasing your materials and measuring the width and length of the window frame where you plan to install the trim. Measurements are necessary to ensure the proper fit and avoid wasting materials. For best results, use a miter saw to cut your trim pieces. Once the pieces are cut, apply a thin line of adhesive to the back and press them firmly against the wall.

The exterior trim should be durable and long-lasting to stand up to the elements. The most common exterior materials are MDF and finger-joint pine, but solid wood is also an option. However, solid wood can be prone to splitting and cracking, so it may require more maintenance. For a durable, cost-effective, and easy-to-maintain option, consider preservative-treated wood. It withstands the elements better than traditional cedar and provides a natural, classic look. It is also available in a variety of finishes and hardware, making it easier to match the style of your existing exterior trim or complete a historically accurate renovation. Belco Forest Products offers this product as an eco-friendly alternative to other wood window trim options.

Fence
Fence

Wooden Fence Repair

From storms to physical damage, fences can be prone to repair needs. It is important to tackle any problems that arise as soon as possible, so your wooden fence will last longer.Fence

One common problem is that fence panels blow over in high winds. This is a simple issue that can be solved by nailing or screwing the panel to the railings. Click https://www.maiseyfence.com/ to learn more.

Whether your fence is made from wood or metal, it relies on a series of posts that give it stability. If one of your fence posts rots or simply becomes too unstable to continue supporting the fence, replacing it is the only option. Replacing a fence post is more than just digging out the old post and replacing it with a new one; you’ll need to brace the new post until it’s vertical and then fill in the soil void around the footer. Depending on the state you live in, you may need to call a local utility company to locate buried power lines and other hazards before beginning your project.

First, remove any screws or nails connecting the damaged fence post to the detachable panel using a cordless drill or hammer. Once these are removed, go to the fence panel side and loosen any screws attaching the horizontal rails to the metal brackets that hold the fence panels. After removing the metal brackets, lift the fence panels upward with an assistant and set them aside.

To dig out the rotten fence post, dig up the concrete footer at least 18 inches around the damaged post and down about two feet. This will expose the underlying wood, which you should then dig out and replace with a suitable replacement like pine or redwood. The best wood to use for fence posts is pressure-treated, which extends the life of the posts by reducing damage from weather and insects.

For more serious damage, a fence patch kit can help repair cracks and small breaks in the post. These kits contain impact- and UV-resistant products that work well for fixing fence posts without the need to completely replace them.

Rails

Over time, weather and general use can take a toll on fence rails. Often, the problem occurs when the ends of a rail begin to rot or fasteners lose their grip. The problem can also occur when a fence has been built on a hill and the rails are unable to adequately support the sloping screen. Fortunately, rails that have loosened or separated from the post can usually be restored by tightening them and reinforcing them with metal post-rail connectors. Before you do this, though, brush the end of each rail with wood preservative to arrest any incipient rot.

The horizontal rails that support the fence screen may be either pickets or solid boards. They can also be part of a decorative pattern that includes other elements, such as diagonal or zigzag patterns. If the rails are loose, the screen will shift or sag, and the resulting gap can create privacy problems or allow people to see into your yard. This is often an easy fix.

For wood fences, use a metal brace kit to lift the corners of the gate. This prevents the gate from dragging and helps the gate last longer. For chain link fences, a come-along tool can be used to pull the chain links back into place.

Fence gates are another common point of deterioration. If the gate is hard to open or close, the track may be sagging or the hinges may have become damaged. This is often caused by dragging or windy conditions. A metal brace can be used to lift the corners of the gate, reducing the tension on the hinges and preventing the gate from dragging.

Wooden fences that are beginning to sag can sometimes be saved by nailing 2×4 bottom rails to the tops of the fence posts. The rails should be positioned flat between the posts, from slightly above grade level to about 12 inches up. Nail the rails to the posts with 10-d galvanized nails driven through the post and into the end of the rail on each side. Begin at one end of the fence and work your way around, making sure to keep the top rail flush with the bottom.

Post-Rail Connectors

Post-rail connectors help fences stay rigid and prevent sagging. They also prevent the ends of the rail from loosening and tearing away from the posts. When you discover a broken portion of a post-and-rail fence, you can repair it quickly and easily with metal connectors that attach to the base of the posts.

Before attempting any repairs, use pliers to disconnect and remove wire ties from the fence fabric at both the top and bottom of the affected section of the rail. If the wire ties are in good condition, set them aside for reuse. Once the ties are removed, dig around the base of the post with a shovel until it releases from the concrete. If the post has been damaged beyond repair, replace it with a new one.

The horizontal rails that support the fence screen, which can be pickets, solid boards, or other decorative pattern elements, often sag over time. This sagging is often caused by the weathering of the rail ends and the loosening of fasteners that hold them in place. To reposition these rails, use a metal post-rail connector that tightens and reinforces them to prevent sagging. These connectors are available from Priefert in several styles and lengths.

For example, a Ponderosa Post & Rail Connector can be used with wood and composite posts to eliminate the need for nailing or screwing rails in place. It provides a 1″ standoff base that reduces the chance of water splashing and corrosion at the concrete attachment point.

Another option is a simple sleeve made of galvanized steel that fits around wooden, metal, and vinyl posts. It’s easy to install and doesn’t require any tools or welding. It’s even more durable than staining and painting, which can chip or rust over time. The sleeve helps keep the post from rotting, and it’s a cost-effective alternative to replacing the entire post. This type of solution is also useful for repairing damaged portions of existing fences. It may take some trial and error to find the right sleeve for your post, so be sure to consult a professional.

Wrought Iron

Wrought iron is a sturdy, dependable material for fences and railings. However, like any metal, it can become damaged over time, and breaks can occur due to stress or weather. Fortunately, most broken iron can be mended easily with epoxy putty or superglue. It is important to follow safety rules when working with iron. Wearing glasses or goggles to protect against shards of metal and a face mask to filter out iron dust can help keep you safe. Work gloves are also recommended.

To begin, you will need to document the condition of the wrought iron and any other parts of the fence. Make sure that you take before and after pictures of any repairs and give a detailed description of the problem. This will ensure that any restoration efforts are accurate and will match the original look of the fence when complete.

Rust is an inevitable part of owning a wrought iron fence, but it is possible to limit its damage by nipping it in the bud before it takes hold. Depending on the severity of the rust, you may be able to remove it by using a wire brush, sandpaper, or chemical rust neutralizers. There are also rust-inhibiting primers that you can use to prevent corrosion from forming.

Once the rust is removed, you can fill in any holes with putty and repaint the area. It is important to select a paint that is specifically for iron and will stand up well outdoors. Then apply two coats of the primer to seal the wrought iron from moisture and corrosion. After this, you can paint the wrought iron a color that matches the rest of the fence.

Some rust can be too extensive to repair with sandpaper or chemical products, and it is sometimes necessary to replace sections of the wrought iron. If this is the case, professional fence services should be called in to do the job. It is important to replace any damaged pieces as soon as possible to prevent rust from spreading further and weakening the entire fence.

Kitchen Remodeling
Kitchen Remodeling

Six Essential Elements of a Successful Kitchen Renovation

Kitchen renovations can range from cosmetic changes like refinishing cabinets to adding an island or changing the layout. Contractors and designers can help create functional spaces that meet your needs. Kitchen Remodeling Tacoma WA can also offer expertise in what will add the most value to your home, including advice on resale options.

Kitchen RemodelingA kitchen remodel isn’t complete without a well-designed layout. Whether you have a small L-shaped kitchen or an expansive U-shaped layout, a harmonious arrangement of cabinets, countertops, and appliances will make your cooking area as functional as it is beautiful. While there are many different layouts, the best plan for your home will usually fall into one of six classic kitchen design plans:

For small renovations or remodels that involve just a few walls and an addition to the existing structure, it’s typically possible to work around the kitchen’s current footprint. This type of renovation can include new drywall, flooring and appliances.

When working with a larger space, it may be necessary to change the entire configuration of the kitchen. This can require dropping or rerouting the gas line and moving plumbing and electrical services. Often times, this type of large kitchen renovation will require hiring an architect or structural engineer to ensure that the changes are safe and code compliant.

Depending on the extent of the renovation, it may be necessary to add additional storage. This can be done through wall storage, shelving and even open shelves. It is also important to remember that a kitchen should be designed with ventilation in mind. It is important to place the oven/stove on an exterior wall to allow for proper airflow and to make it easier to install a hood vent. This is especially important in homes with older or uninsulated kitchens. Also, it is important to place the sink in an area that allows for proper drainage and water flow. This will help to keep the floor and other surfaces clean. Finally, it is important to install a light fixture that is appropriate for the size of the room and the function of the kitchen.

Appliances

One of the best things about a kitchen renovation is swapping out old appliances. Whether you’re looking for high-end luxury models or cost-efficient energy efficient ones, there are options to suit every budget. Choosing your ovens, refrigerators and dishwashers is a personal choice that should be informed by your needs, available space and design preferences.

Kitchen appliances are an investment, and if you’re going to spend the money, why not make it count? Upgrades like multifunctional islands, double wall ovens and custom lighting can give your kitchen a more dynamic look and feel.

You’ll also have the opportunity to choose from a variety of different appliance finishes and colors. It’s important to choose a color palette that complements the rest of your home. Choosing a neutral tone like whites and tans allows you to incorporate more unique elements in small doses, so your kitchen doesn’t look too busy or dated.

There’s no question that modern, smart appliances are the way of the future. From energy-efficient dishwashers to smart ovens that let you preheat from the convenience of your phone, there’s no end to the ways in which high-tech features can enhance the function and aesthetic of your kitchen.

Keep in mind, though, that if you over-customize your kitchen, it may limit its appeal to potential buyers down the line. Including an extra-large wine cellar or built-in storage for cookbooks might seem luxurious, but it’ll only cater to a specific audience of homeowners. Instead, focus on features that will appeal to a wide range of people, such as extra cabinet space or an oversized double sink. These updates can be more practical, less expensive and easier to maintain.

Countertops

Countertops are one of the smallest but most important elements in your kitchen renovation. They can act as a foundation to anchor your design style, establishing the tone of your space. A simple choice of edge can also create a dramatic difference and help your countertops pop. This is why it’s so important to work with a professional who understands the importance of creating smooth and seamless countertops.

The material you choose for your kitchen countertop is a crucial decision and will affect both cost and durability. There are several options, including natural stone and solid-surface materials. If you’re looking for something dramatic, you can try marble, which comes in a wide variety of colors and veining patterns. However, it’s important to note that marble isn’t heat-resistant, and you’ll need to take special care with hot pans or risk stains or scratches.

Laminate countertops are budget-friendly and available in a range of designs. They’re not as durable as stone, however, and are susceptible to bubbling, cracking, and scratching, which can make them unattractive and expensive to repair.

Wood countertops are a classic option and offer a warm, natural look. They can be crafted of traditional maple or walnut, but are more commonly made from less-familiar species like teak and mahogany. While wood counters are easy to clean (a simple scrubbing with soapy water will do the trick), they do need to be treated carefully to prevent moisture damage.

Another popular choice is granite, which is both tough and durable. While it can be expensive, it offers a long life span and can stand up to impact and abrasive damage. Its natural beauty comes in a wide array of color and pattern options, from subtle neutral tones to dramatic veining.

Cabinets

Cabinets are the biggest expense in a kitchen renovation and can be the most important design element, defining your kitchen style. You can choose to have consistent cabinetry, or opt for a mix of styles, materials and finishes.

A durable and timeless option, solid wood cabinets are a classic choice for any kitchen. They come in a variety of shades, from light maple to rich oak to dark cherry. You can also find painted, distressed or glazed cabinetry that gives your kitchen an eclectic vibe.

If you’re reworking your cabinets but don’t want to commit to a whole new set, you can paint your current cabinets for a fresh look without the time and cost of reworking them entirely. Pick a bold color that complements your countertops, floors and other elements in your kitchen for an instant upgrade.

You can opt for frameless cabinets, which have no face-frame and are often seen in modern designs. Partial overlay doors are more traditional, with the door covering only a portion of the cabinet face. You can also go with louvered cabinet doors, which have horizontal wood slats and add texture to the room.

Specialty cabinets are a way to make the most of your space and keep things better organized. These include tall cabinets for appliance storage, corner cabinets and suspended work areas.

You can save money by buying stock or semi-custom cabinets and installing them yourself, or you can hire a professional to do the job. A reputable cabinet supplier should have crews that can install cabinets quickly and easily, typically over a day or two. A skilled DIYer with a helping hand can also install stock or semi-custom cabinets, but custom cabinets should always be left to professionals in order to protect the warranty.

Flooring

Flooring is one of the most important elements in a kitchen renovation because it sets the tone for the entire space. Hardwood floors are a classic choice, offering durability and versatility. Reclaimed wood is a great option that is eco-friendly and affordable. Tiles are another timeless kitchen floor material, with a wide range of styles and colors to suit any budget. Tiles are easy to clean and can stand up well to moisture and heat. Popular choices for kitchens include ceramic and porcelain tiles. For a more modern kitchen, try large-format tiles in neutral colors that can ground any style.

For a less traditional but still durable option, consider concrete floors. This kitchen floor material is extremely durable and offers a cool, industrial look for your home. While concrete is low maintenance, it can be difficult to install and is best left to experts.

Vinyl is another great option for kitchens, as it’s waterproof and does a good job of resisting stains. It also comes in a variety of colors and patterns to fit any style and decor. Vinyl flooring can be a great option when your kitchen renovation budget doesn’t allow for more expensive materials like hardwood or stone tiles.

Finally, linoleum is an all-natural option that comes in a range of patterns and colors to match any kitchen design. It’s soft underfoot and can help alleviate back pain and muscle fatigue from standing in the kitchen for long periods of time. Linoleum is available in sheets, tiles and click-and-lock flooring options. It’s a great choice for any kitchen, whether you’re going for a retro or a modern look. Once you’ve chosen your kitchen floor, be sure to get any necessary electrical work done and to remove the existing backsplash before installing the new flooring. This will protect your backsplash from damage and save you the time of having to paint around outlets later.